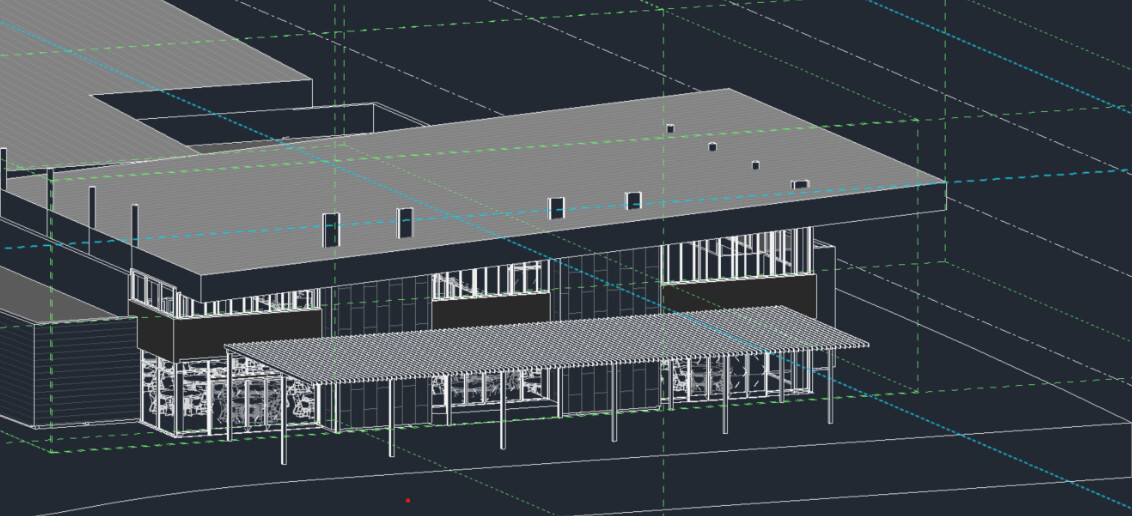
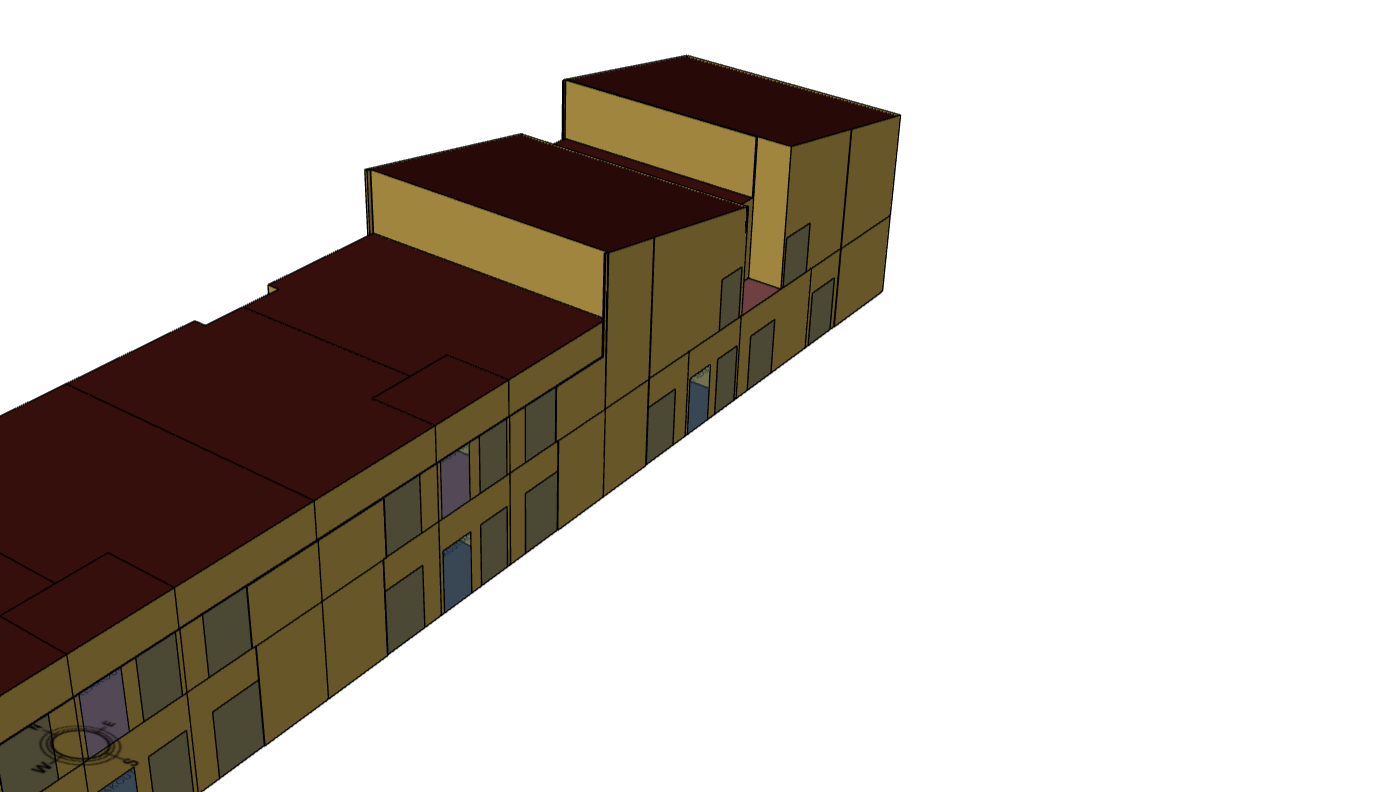
I have high clerestory windows under a slanted roof. It’s a one story building. When I open the revit model in the Model Editor, the lower windows show up appropriately but the higher windows don’t. All rooms are checked as “ground contact” and “top exposed.”
Do you have any tips for me to ensure that the high windows show up correctly?
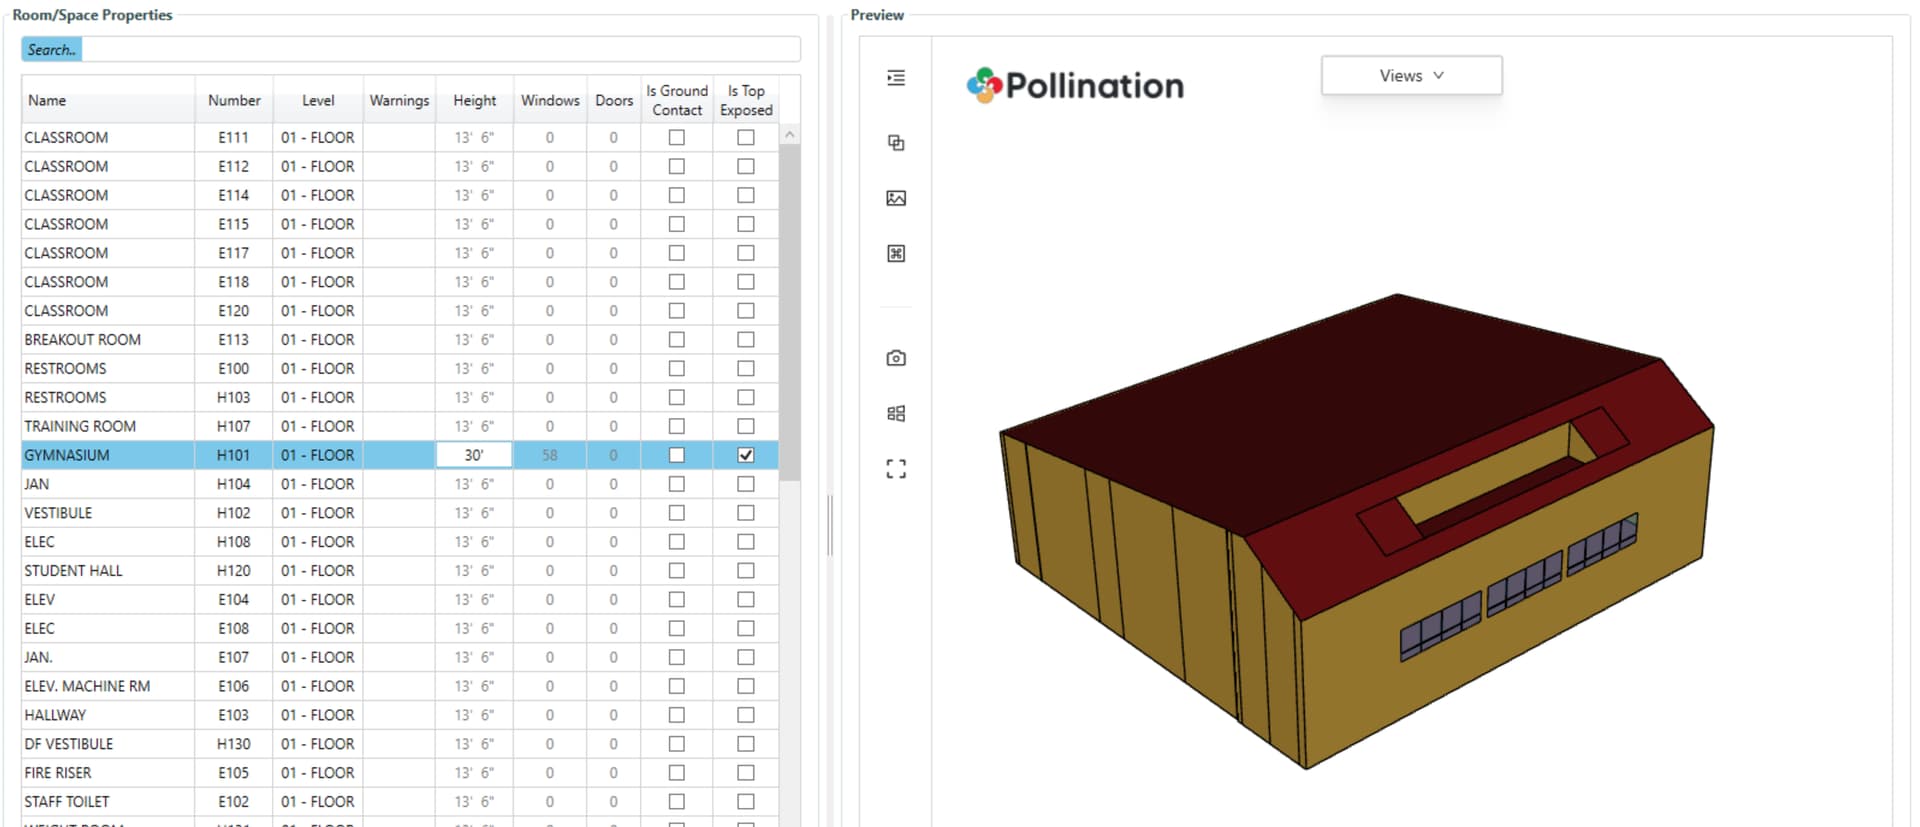
If I have to guess without seeing your model, you haven’t set the height of the rooms to be tall enough to capture those windows. I assume you are using the extruded mode, which you should, and in that case, you should select these rooms and override the height to be tall enough to capture the clerestory windows.
Here is a short video using the Revit sample model.
P.S. Thank you for posting your two questions as two separate topics. Appreciate it!
Hi @mostapha, your tips were helpful and resolved the main problem = it saved me the time I would have spent manually adding them.
What I cannot figure out is how I could possibly add windows that are above an inset room. This is not a problem I need to solve (i added them manually), but I am sharing for awareness/learning purposes.
As you can see in the image, there is another 1st floor room that is shorter and takes up the space below the room to which the windows belong (also a 1st floor room). (as a reminder, the whole building is only one story).
Maybe this is a very unique situation for which there is not automated solution. Sharing in case it is helpful to you and curious to hear if you have any thoughts.
That’s a limitation of the current publicly available version. What happens is such cases the windows are removed when you run solve adjacency.
@chriswmackey has made several improvements that should address this issue. Can you share the raw Pollination model with those windows with us for testing to make sure we can handle this case in the upcoming version?
Thanks for bringing this to our attention. The windows were supposed to come through automatically as long as you had the “Is Top Exposed” checked on the adjacent room.
It seems we accidentally removed this window preservation at some point with another change that was intended to prevent errors from being thrown. I just made a change that ensures the windows come through for this case and still prevents errors from being thrown in others where the adjacent room does not have the “Is Top Exposed” checked:
So this will be in the next release. Thanks again.
hi @chriswmackey and @mostapha,
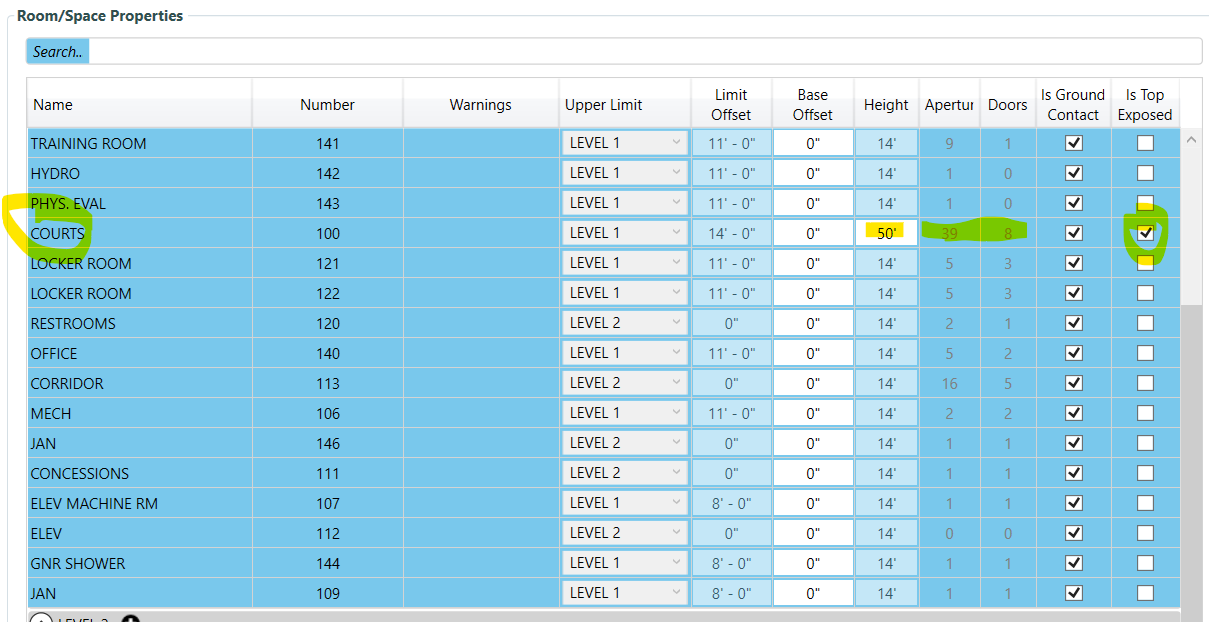
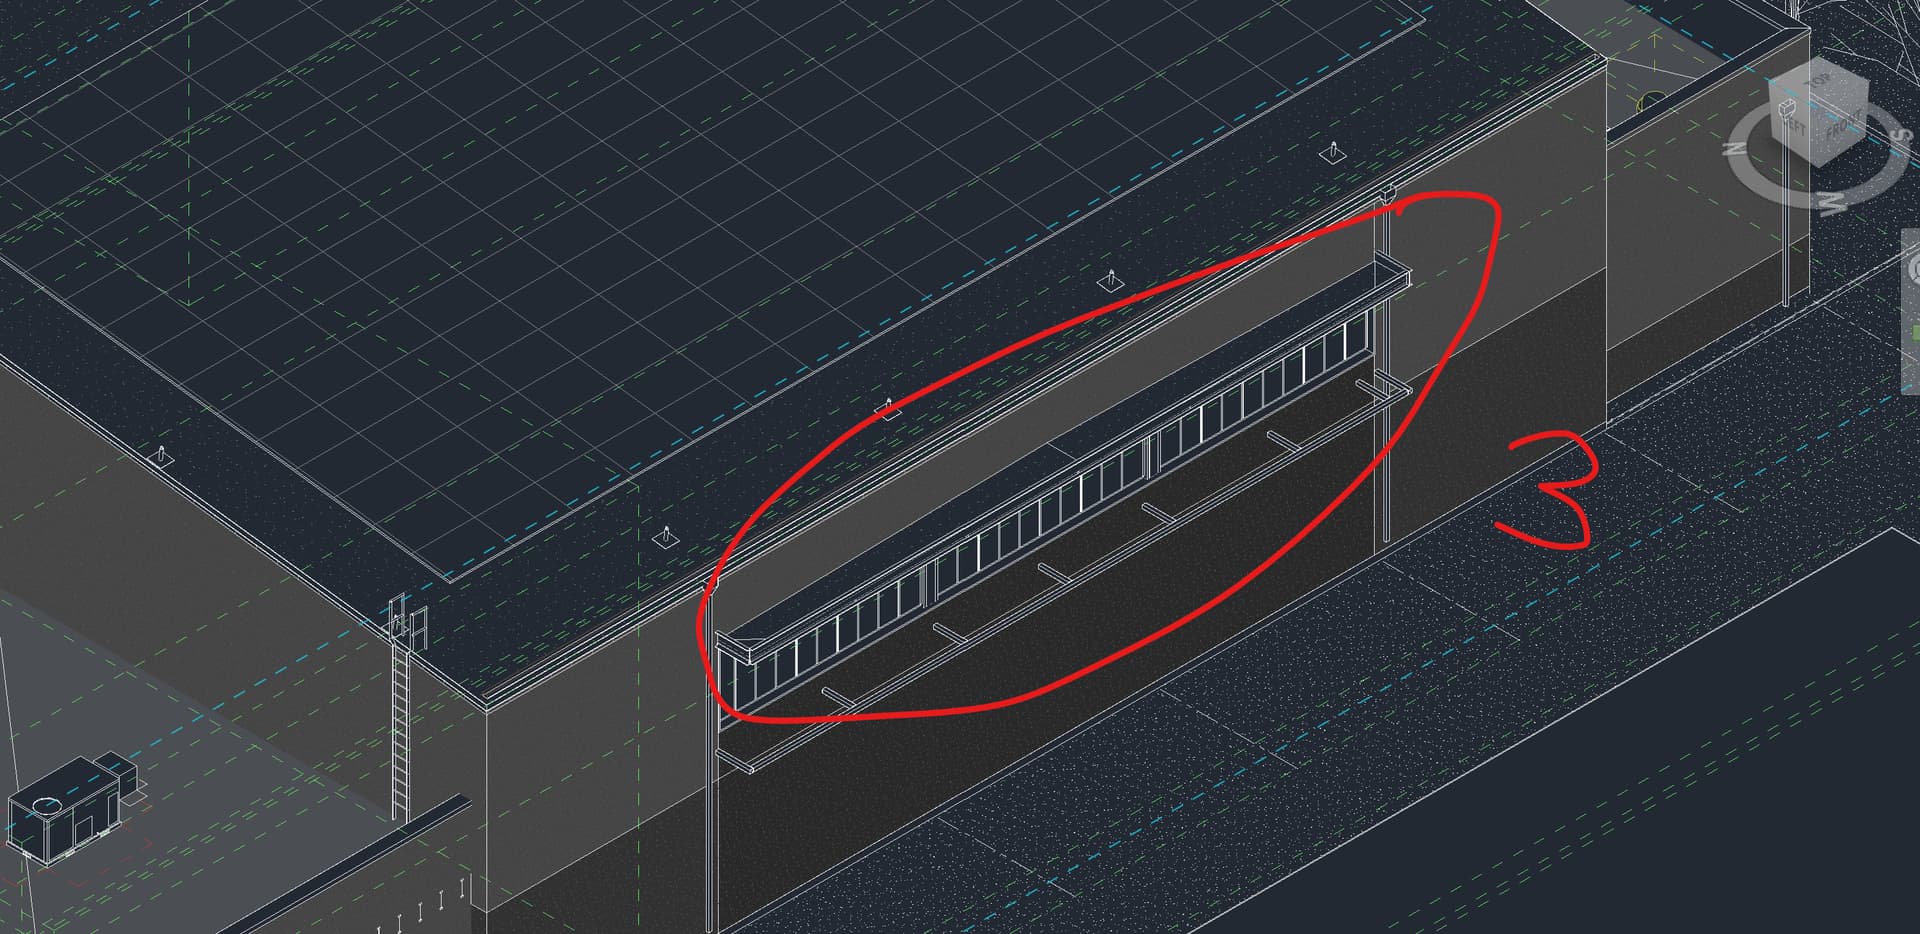
I am gonna extend this conversation since I am experiencing another tricky situation where I have several clerestory windows within one room (called COURTS below).
I already checked “top exposed” and extended the height to and beyond the height of the building, but the windows still don’t show up.
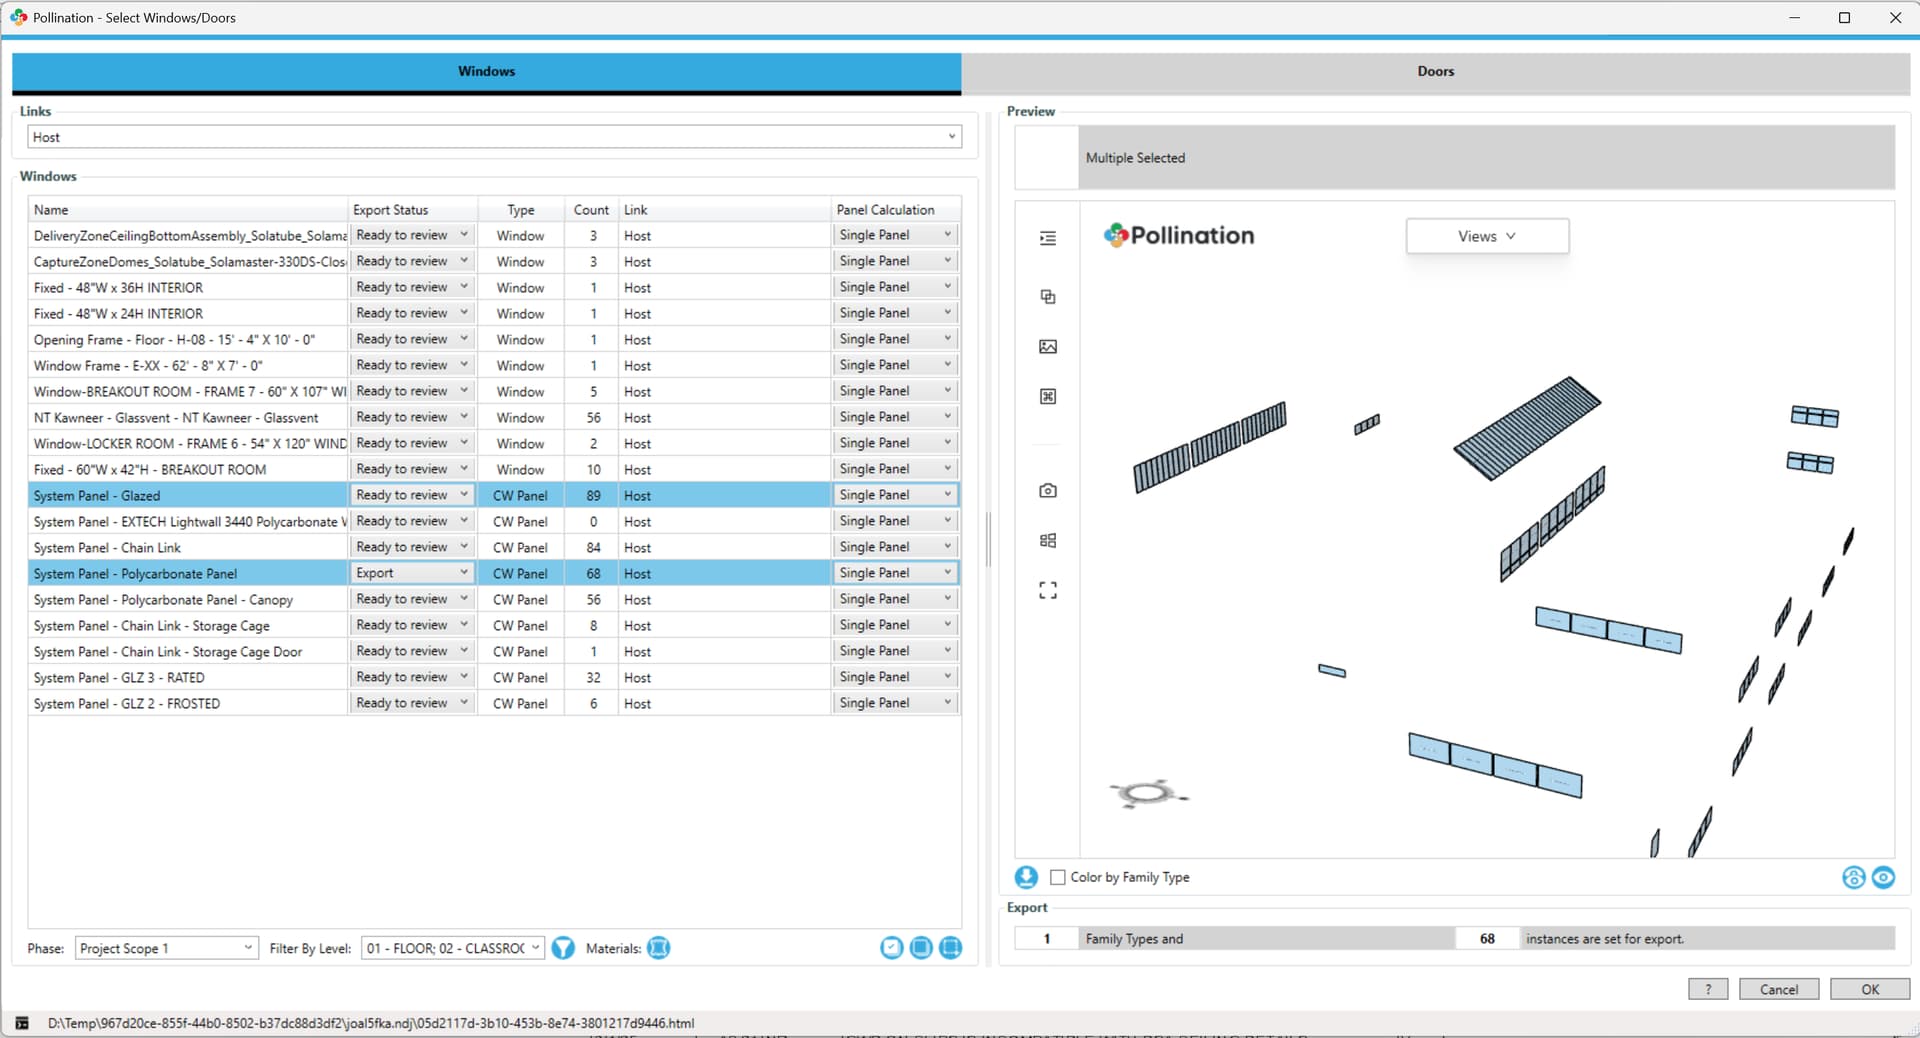
Hi @alterleon, hmm. This should not be happening. Do you see these windows in the Select Apertures/Doors 3D preview? Can we have access to this Revit model for debugging?
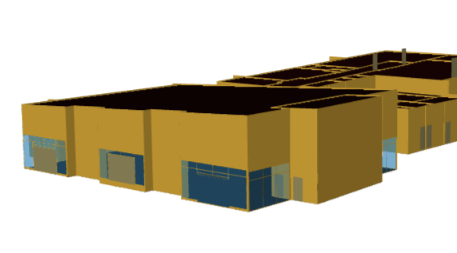
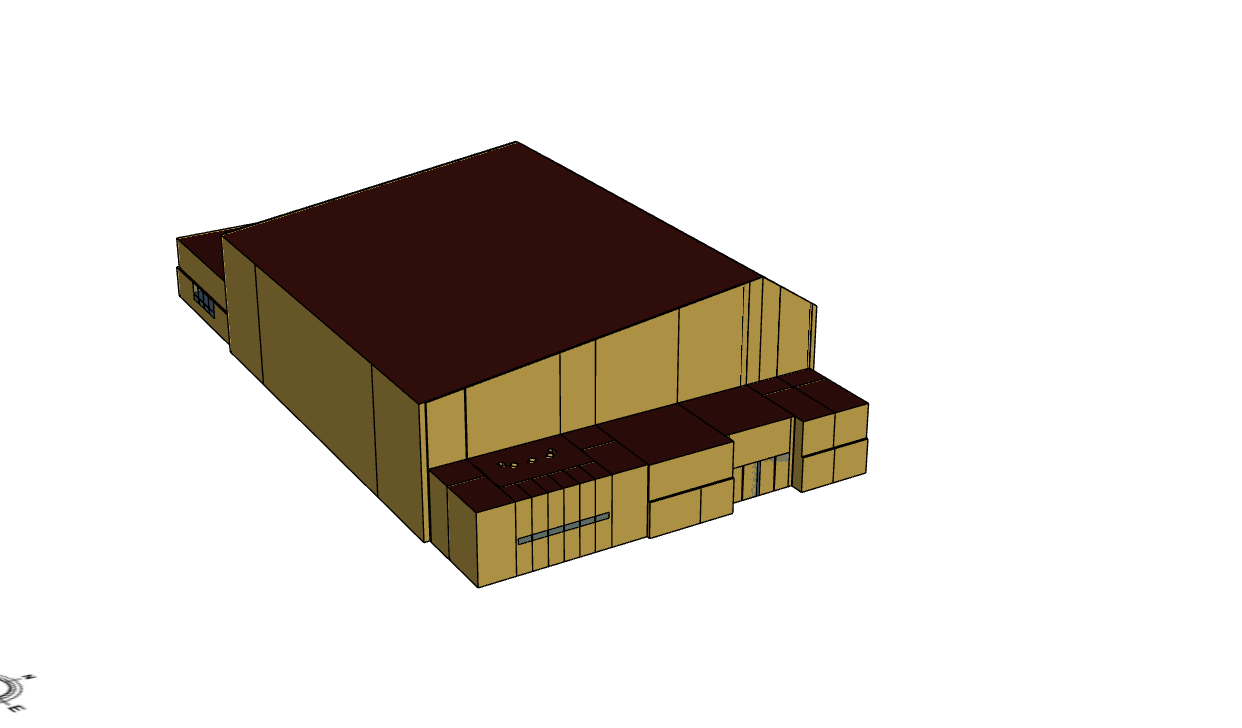
While the windows show up in 3D revit view (as seen in the images above), when I look at the windows that show up in the pollination editor, the don’t look the same. The windows in the pollination window plugin actually look like they are from an older version (image below).
I circled the windows that are clearly from an older design option:
Hi @alterleon, thank you for the kind words, and sorry about the issue.
Am I correct that I have already shown you the “import windows” workflow? Are you using that? Otherwise, I can record a video and show you how that could work. I will need the windows in the preview to be exported as an HBJSON, and the base model PoMF file.
For the skylight being projected to the wrong plane, can you try installing this version? We have made several new improvements to get the windows showing up on the correct plane.
Hi @mostapha, thank you! Yes, I am aware of the window workflow within Revit, and I knew (+ you reminded me again) of the option to import windows separately in the Desktop Model Editor.
Are you saying that i should export the window file in Revit and then add it separately in the model editor?
Yes. Let’s try that workflow and see if it resolves the problem. It should fix the issue for most of the cases. Just make sure to update to the latest version that I shared above so you get the skylights on the correct plane.
As always, let me know if you need any help from me.
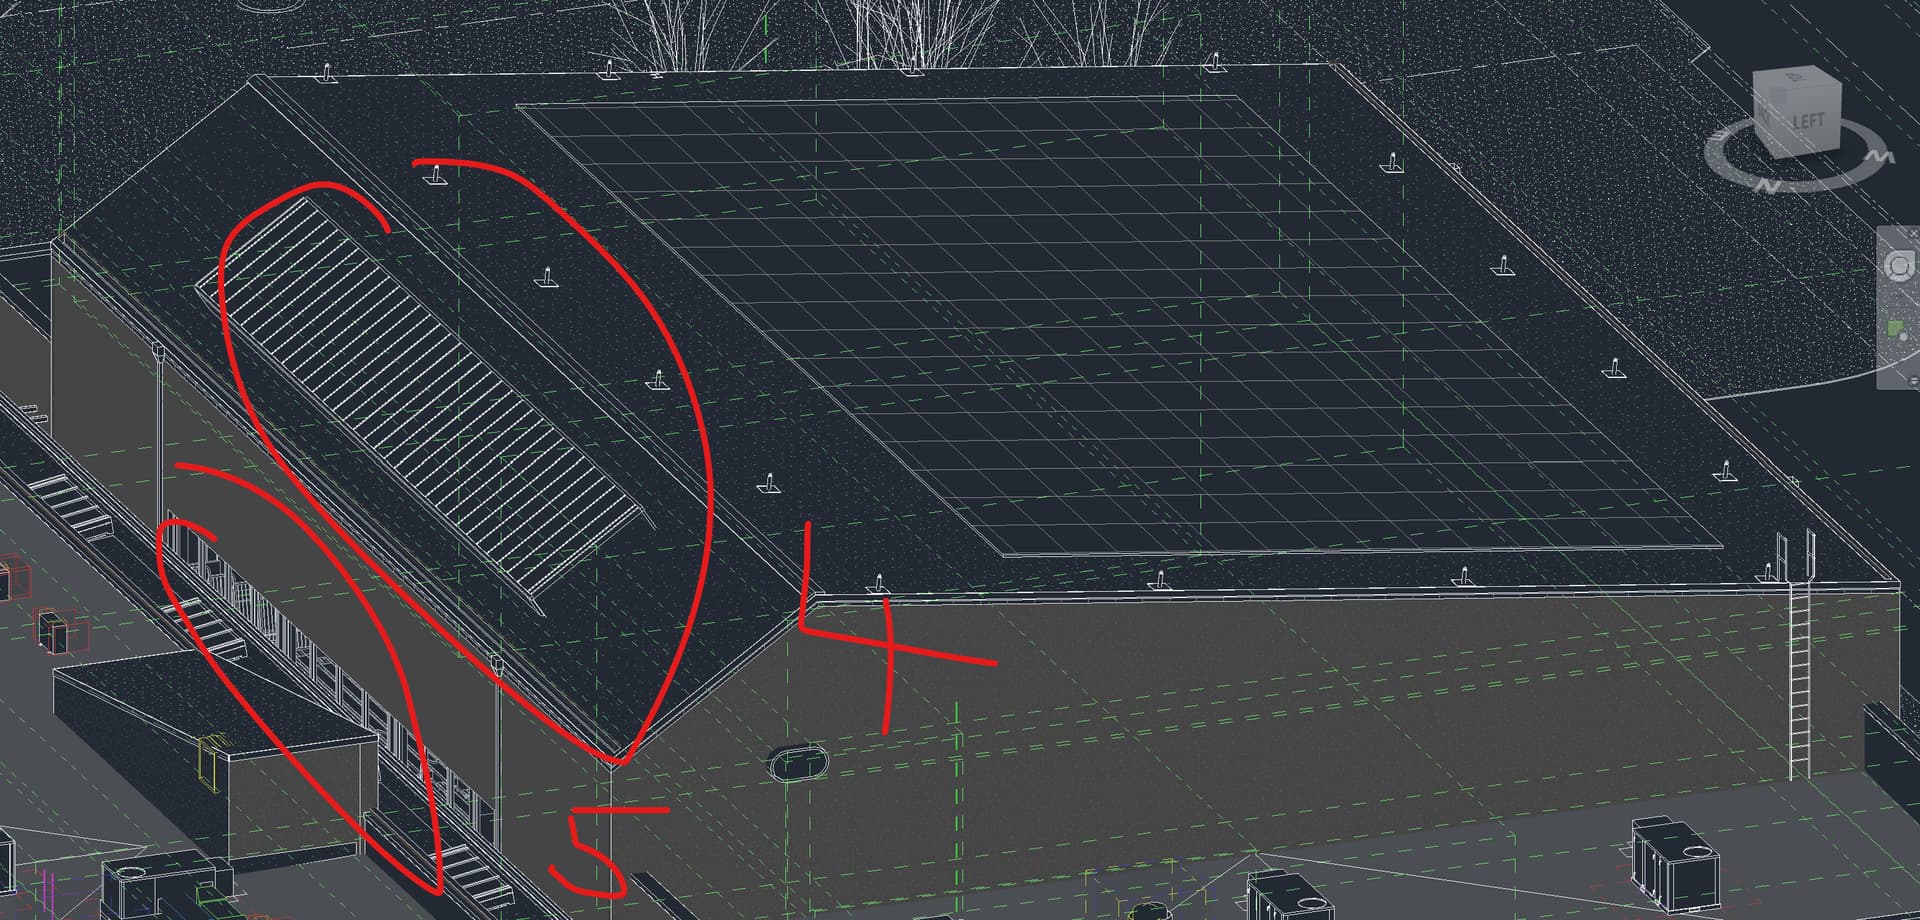
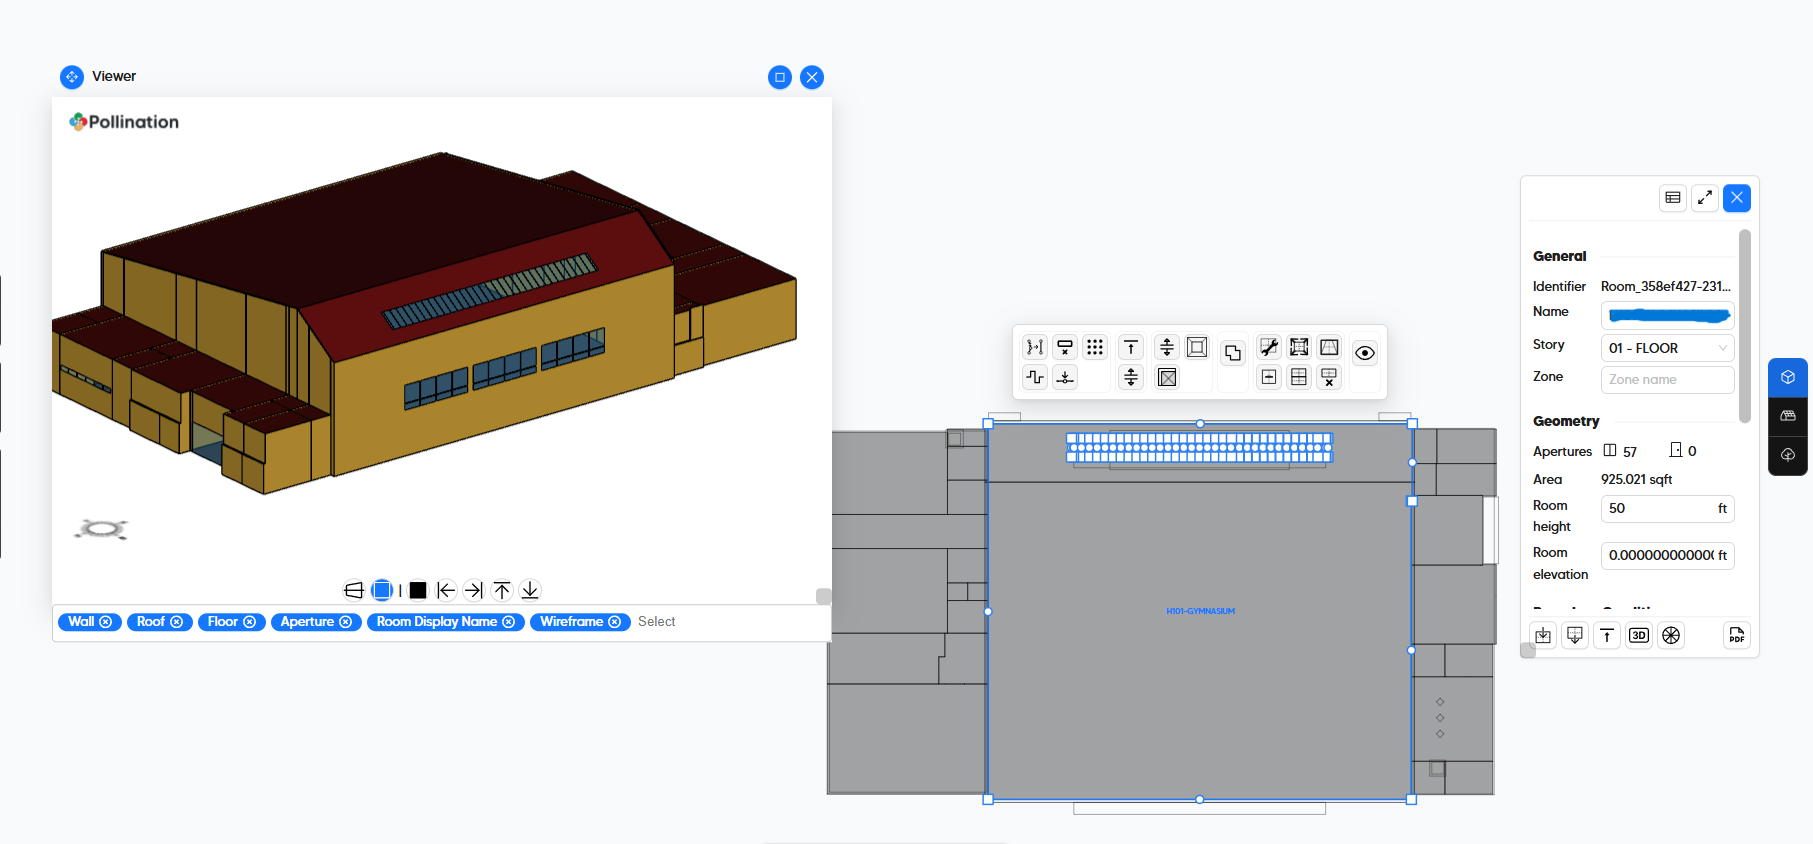
The reason why the skylights were not coming through is that the Room height was set too low such that it did not overlap with the skylights within the “Projection Distance.” If I just set the room height to 50 ft, it gets assigned without an issue:
If we think that this will be a recurring problem, I can probably use the max roof height instead of the room extrusion height for any Room2D assigned to a Story with a roof. It could have an effect of some rooms getting unexpected skylights if the room is bounded by a lower set of roof geometries on the story. But maybe this case is rare enough compared to ones like this where we expected skylights and did not get them.
Thank you, @chriswmackey! Just to make sure we don’t confuse @alterleon, your statement is correct but only works after I fixed the plane of the skylights in Rhino.
Konrad has already fixed the issue with skylights and @alterleon should be able to use the fixed version for the next iteration of this model after updating the Revit plugin. I’ll try to record a video to better explain this case later this evening.
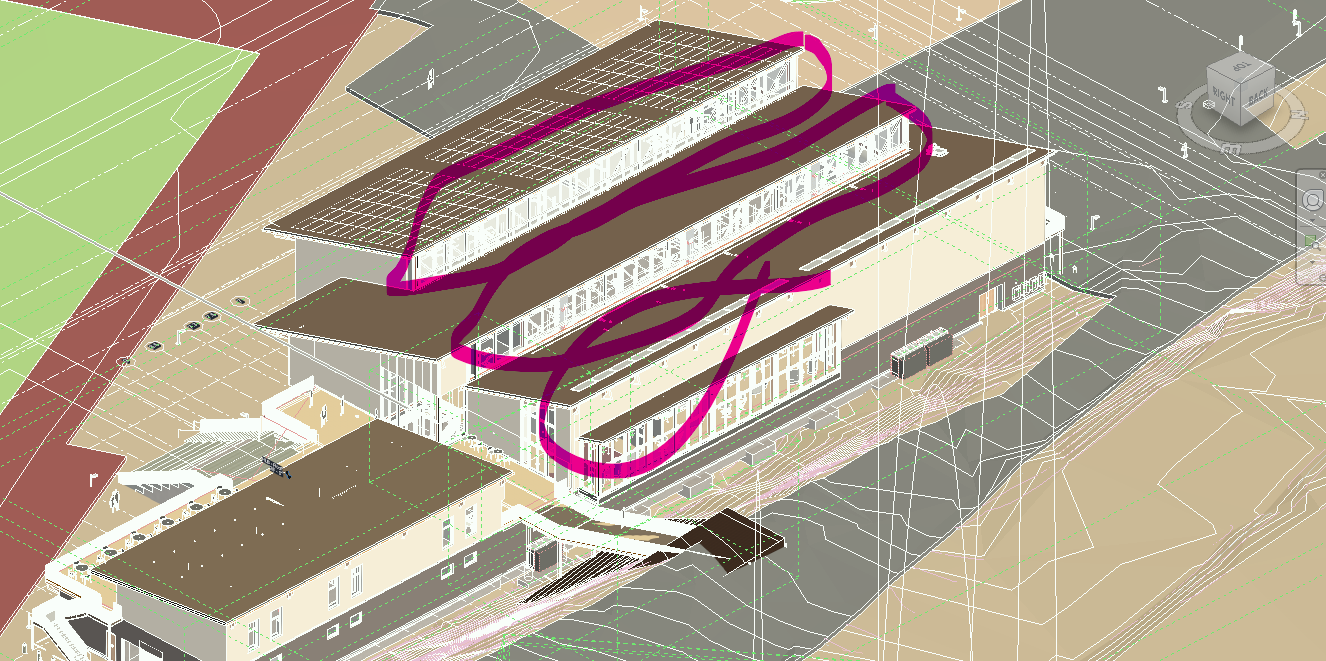
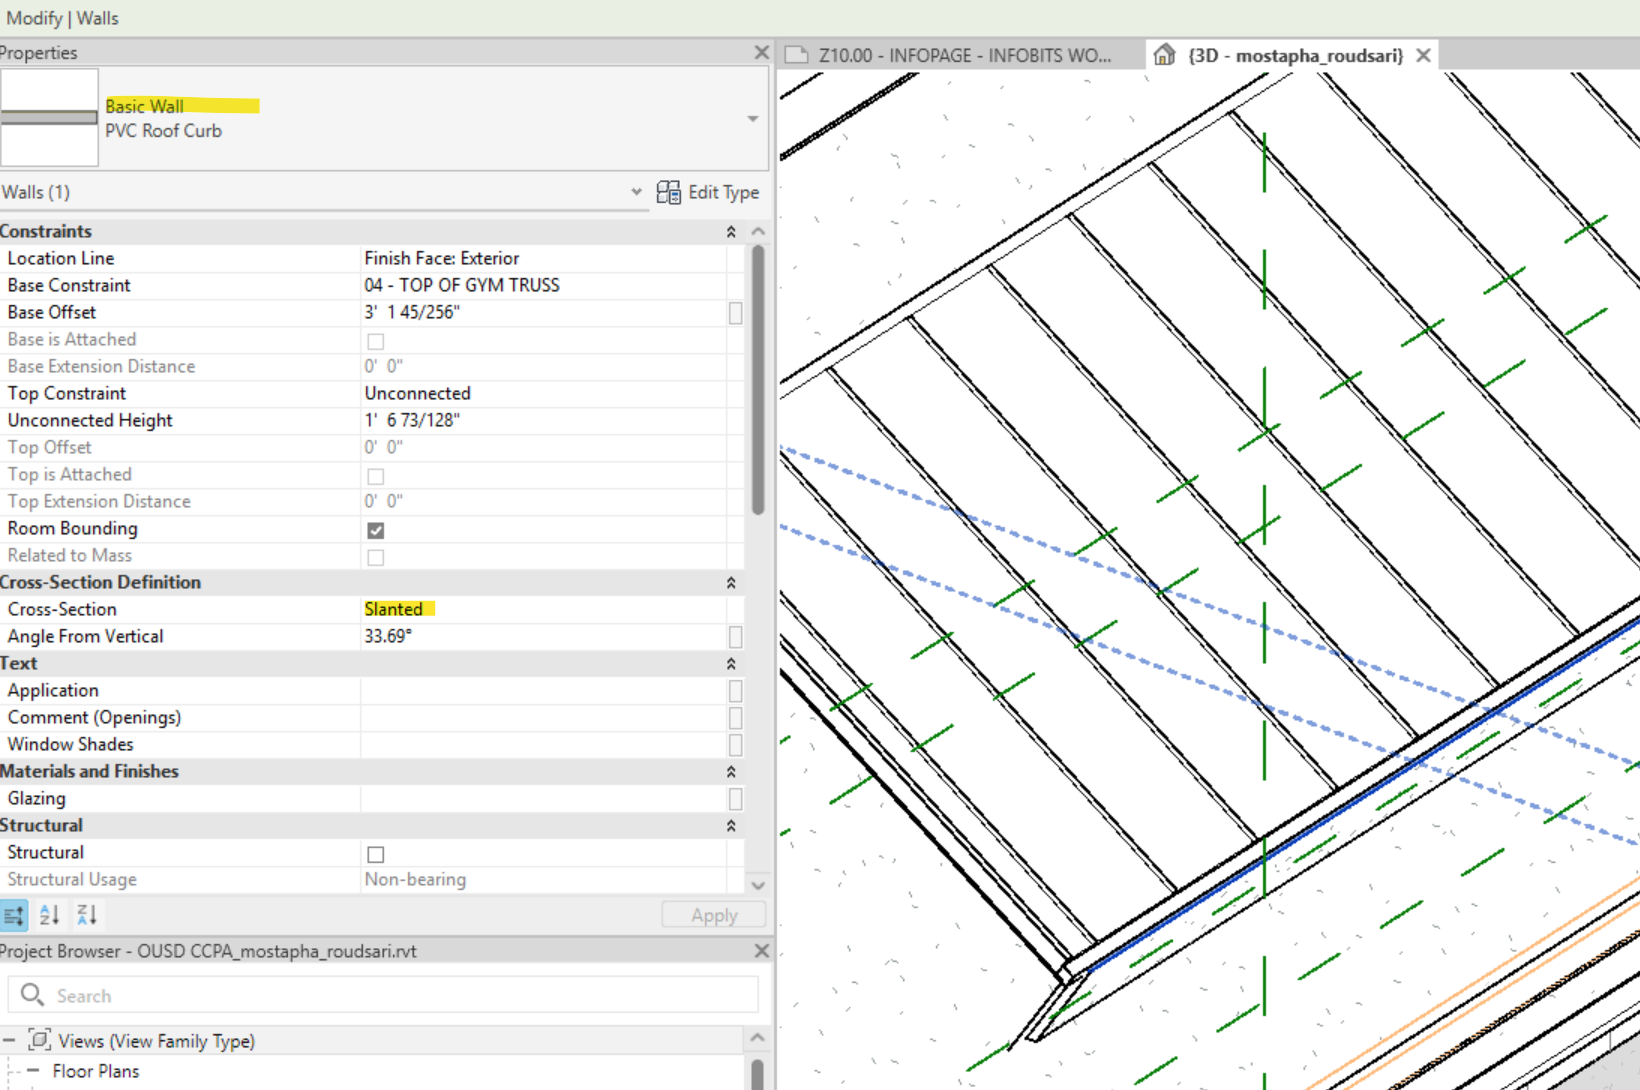
The reason it was not captured correctly initially was because this curtain wall is modeled as a slanted wall instead of the standard approach of using a roof.
This will create all sort of other issues including introducing a hole in the roof but we can deal with those in the Model Editor by removing the hole from the roof.